WebGL 的入门教程,实现一个旋转的三维立方体
时间:2025-3-25 12:27 作者:独元殇 分类: 前端技术
[toc]
前言 1
昨天,我在电脑里发现了以前学习 WebGL 的代码和笔记,然后我就整理了一下,写成了一个教程。写完后,发现字数还不少。如果大家对浏览器显示三维的玩意儿感兴趣,可以读一下,能当教程,也能当简易的文档查阅。WebGL 是浏览器的三维引擎,但它很原始和底层,就像你买了个计算器,发现这个计算器只有一个加号键一样..... 什么都需要自己去手写。
前言 2
WebGL 是一个在浏览器里使用的高效渲染二维和三维图形的 javascript API,于 2006 年起源,该技术基于 OpenGL。我们在网上看到的很多炫酷的三维效果,都是使用 WebGL 实现的。基于它也有相当多的 3D 库,比较著名的有 three.js 、babylon.js ...
我们即便在项目中还是使用成熟的框架,但最终我们还是不免有一天来探索一下 Webgl 的原理,本教程特别适合我们去入门学习。
它的代码由 javascript 和 GLSL(OpenGL 着色语言)组成,后者和 C 语言很接近,不过结构很简单,程序员看到都会感觉很熟悉。
WebGL 的代码,除了是使用 javascript 写的之外,其余的基本和前端就没关系了,是一个比较专业的领域。废话不多说,下面几小节内容,将会带大家简单地入门 WebGL。
完整的示例代码,可见 https://github.com/kohunglee/webgl_learn
当然,为了方便学习,下文中每小节的末端也会附上本节程序的【完整代码】 的折叠形式,方便调试。
第一节 绘制出了一个点
效果演示
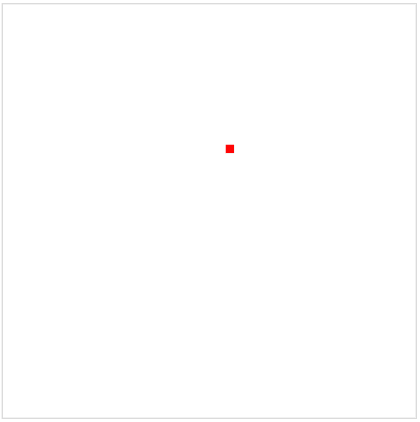
这是一个最小可运行的 webGL 代码。效果如图:
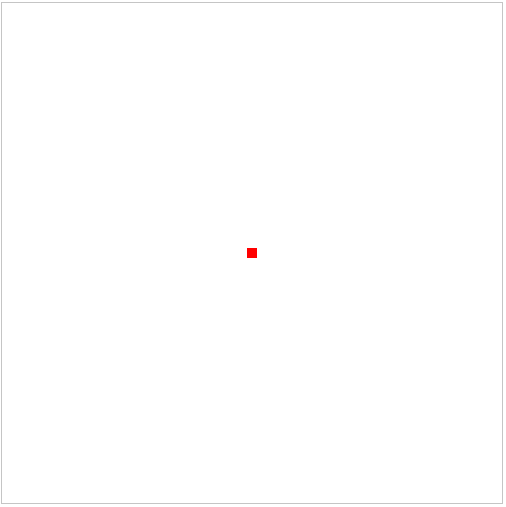

    <canvas class="canvas" width="500" height="500">

    </canvas>
    <!-- 顶点着色器--><script id="vertex-shader" type="x-shader/x-vertex">
        void main(){
            gl_PointSize = 10.0;
            gl_Position = vec4(0.0, 0.0, 0.0, 1.0);
        }
    </script>

    <!-- 片元着色器--><script id="fragment-shader" type="x-shader/x-fragment">
        void main(){
            gl_FragColor = vec4(1.0, 0.0, 0.0, 1.0);
        }
    </script>
    <script>
        const canvas = document.querySelector('.canvas');
        const gl = canvas.getContext('webgl');

        // 创建顶点着色器和片元着色器
        const vertexShader = gl.createShader(gl.VERTEX_SHADER);
        const fragmentShader = gl.createShader(gl.FRAGMENT_SHADER);

        // 创建着色器源码
        const vertexSource = document.getElementById('vertex-shader').innerText;
        const fragmentSource = document.getElementById('fragment-shader').innerText;

        //绑定着色器源码
        gl.shaderSource(vertexShader, vertexSource);
        gl.shaderSource(fragmentShader, fragmentSource);

        // 编译着色器源码
        gl.compileShader(vertexShader);
        gl.compileShader(fragmentShader);

        // 创建程序对象
        const program = gl.createProgram();
        gl.attachShader(program, vertexShader);
        gl.attachShader(program, fragmentShader);

        // 链接
        gl.linkProgram(program);
        gl.useProgram(program);

        // 绘制
        gl.drawArrays(gl.POINTS, 0, 1);
    </script>
逐行解释
首先是第一行的 canvas 元素,我们发现有 width="500" height="500",画布大小应该在这个地方或 js 里定义,而不要在 CSS 里面定义,否则画面会拉深。
/* 注意,不要在 CSS 里面定义画布大小,下面这种写法是错的! */
.canvas {
    width:500px;
    height:500px;
}之后是两行着色器源码。一个叫顶点着色器,一个叫片元着色器。它们可以写在 js 代码里,在这里方便演示,也为了显得更规范,我们写在了 html 的 script 标签里。
- 顶点着色器:,处理每个顶点的坐标、大小、法线等(换句话说,它用于将点从抽象的对象坐标系,转换到屏幕坐标系)。
- 片元着色器:处理每个像素的颜色(它可以接收 顶点着色器 插值后的数据)。
先看顶点着色器:
main 是主函数,里面代码的解析如下:
gl_PointSize = 10.0;  // 点 大小是 10
gl_Position = vec4(0.0, 0.0, 0.0, 1.0);  // 点的坐标位置是(X: 0 ,Y:0, Z:0),是一个 3D 点。
在 gl_Position = vec4(0.0, 0.0, 0.0, 1.0); 中,坐标为 (x, y, z, w) 类型。其中 w 是指的该坐标是否参与透视,如果是 1.0 则参与,这是个 3D 点(近大远小),如果是 0.0 则不参与,则是一个普通的向量。
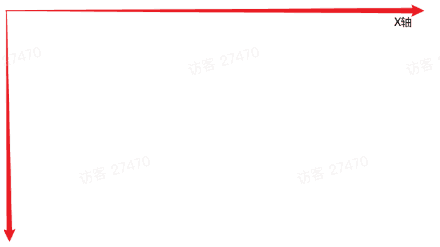
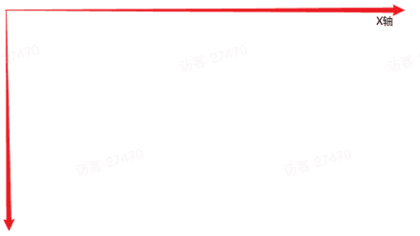
在 webgl 的画布里,坐标和以往的 <canvas> 之 2D 坐标是不一样的。WebGL 的坐标如下,0 点是在画布正中央:

而以往 <canvas> 之 2D 绘图,我们的坐标是:
片元着色器:
gl_FragColor = vec4(1.0, 0.0, 0.0, 1.0); // 像素的点的 RGBA 值是(1.0, 0.0, 0.0, 1.0),红色RGBA 每个值的含义:前三个分量分别对应红(Red)、绿(Green)、蓝(Blue),范围通常是 0.0(无强度)到 1.0(最大强度)。第四个分量是 Alpha,表示透明度:
向量类型
vec4 是向量类型,在 glsl 里,常用的向量类型有 vec2、vec3、vec4。
之后是 js,第 19 行的 const gl = canvas.getContext('webgl'); 中,一定要在 getContext() 函数参数里写 webgl。这个对象的命名,我们一般习惯使用 gl。
第 18、19 行,不多说了。而 26、27 行,我们使用 innerText 将两个着色器的源码传进 js 里。(其实在这里,我们以 js 字符串的形式将 glsl 代码写入也可以。)
webgl 的绘制过程,可以简单总结为:绑定着色器源码并编译、创建对象并链接、绘制。
这几个都是固定的 API 写法,如代码里的注释的那样,没太多要讲的。我们记住即可,写完这几个步骤就可以输出一个红点了。后面的代码会在此基础上添加很多东西,会显得很复杂。大家要敲几遍熟悉本节的这几个固定的内容。
第二节 动态传递点数据
我们的程序,不可能只绘制一个固定的点,我们要有很多动态内容。两个【着色器】只是定义一个固定的渲染模式,我们不能写死,所以我们需要在 js 里写“活”的东西,让【着色器】来接收并渲染。
我们本节,要将点的坐标,放到 js 里去定义,那么我们就需要做以下两个动作:
- js 可把点的坐标数据传入顶点着色器。
- 顶点着色器,可接收 js 的点的数据。
首先是第一点。我们在代码中【链接】和【绘制】中间里添加如下代码:
// 动态传递点数据
const posLocation = gl.getAttribLocation(program, 'aPos');
const posLocation1 = gl.getAttribLocation(program, 'aPos1');
const offset = [0.5, 0.5];
const offset1 = [0.1, 0.3];
gl.vertexAttrib2f(posLocation,...offset);
gl.vertexAttrib2f(posLocation,...offset1);
然后是第二点。我们修改顶点着色器的源码:
/*
    attribute :用于顶点着色器,从顶点缓冲区传入的变量
*/
attribute vec2 aPos;
attribute vec2 aPos1;
void main(){
    gl_PointSize = 10.0;
    vec2 newPos = aPos + aPos1;
    gl_Position = vec4(newPos, 0.0, 1.0);
}
aPos 和 aPos1 两个向量,就可以这样从 js 传递到 glsl 里,
为了方便演示向量是可以添加的,所以,代码这里特异定义了两组坐标,以顺便将“向量可相加”这个知识点展示出来。
其中核心的方法是 vertexAttrib2f(),它可以直接设置顶点 2D 属性值,它的参数如下:
gl.vertexAttrib2f(index, x, y);-
index 是指的什么属性,在我们的代码里,是指的
aPos和aPos1这两个属性,和 glsl 里相对应。 -
参数 x 和 y 则是两个浮点数值,表示顶点的 2D 坐标。
在 javascript ES6 中,... 是展开操作符,vertexAttrib2f(posLocation, ...[0.5, 0.5]) 等同于 vertexAttrib2f(posLocation, 0.5, 0.5)。
变量修饰符
attribute 是一个变量修饰符,被它定义的变量,可以在 js 里被赋值。除它之外,还有两个常用的变量修饰符。
- attribute: 用于顶点着色器,定义从顶点缓冲区传入的变量(仅在顶点着色器中使用).
- uniform: 定义在整个渲染过程中保持不变的变量,常用于传递变换矩阵、光照参数等
- varying: 用于在顶点着色器和片段着色器之间传递插值数据。
被 attribute 修饰后的 aPos 和 aPos1 可以在 main() 里接收,进行四者运算。
vec2 newPos = aPos + aPos1;
// 等于
vec2 newPos = vec2(0.5, 0.5) + vec2(0.1, 0.3)
// 等于
vec2 newPos = vec2(0.5 + 0.1, 0.5 + 0.3)
// 等于
vec2 newPos = vec2(0.6, 0.8)
而,vec2() 向量也是可以直接进入 vec4() 向量里面运算的。
vec4(newPos, 0.0, 1.0)
// 等于
vec4(vec2(0.6, 0.8), 0.0, 1.0)
// 等于
vec4(0.6, 0.8, 0.0, 1.0)
然后我们的点的新坐标便是(X:0.6,Y:0.8,Z:0.0),比上一节向右上偏移了点儿,效果如下:
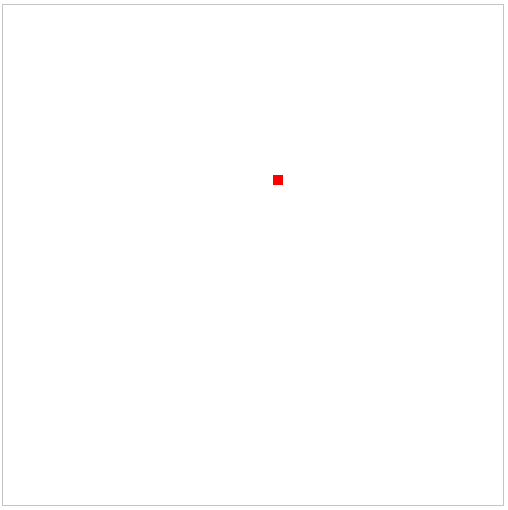
完整代码
本节的完整代码如下:
    <!-- 顶点着色器--><script id="vertex-shader" type="x-shader/x-vertex">
        /*
            attribute :用于顶点着色器,从顶点缓冲区传入的变量
            也就是 `gl.getAttribLocation` 使用
        */

        attribute vec2 aPos;
        attribute vec2 aPos1;
        void main(){
            gl_PointSize = 10.0;
            vec2 newPos = aPos + aPos1;
            gl_Position = vec4(newPos, 0.0, 1.0);
        }
    </script>

    <!-- 片元着色器--><script id="fragment-shader" type="x-shader/x-fragment">
        void main(){
            gl_FragColor = vec4(1.0, 0.0, 0.0, 1.0);  // 红色
        }
    </script>
    <script>
        const canvas = document.querySelector('.canvas');
        const gl = canvas.getContext('webgl');

        // 创建顶点着色器和片元着色器
        const vertexShader = gl.createShader(gl.VERTEX_SHADER);
        const fragmentShader = gl.createShader(gl.FRAGMENT_SHADER);

        // 创建着色器源码
        const vertexSource = document.getElementById('vertex-shader').innerText;
        const fragmentSource = document.getElementById('fragment-shader').innerText;

        //绑定着色器源码
        gl.shaderSource(vertexShader, vertexSource);
        gl.shaderSource(fragmentShader, fragmentSource);

        // 编译着色器源码
        gl.compileShader(vertexShader);
        gl.compileShader(fragmentShader);

        // 创建程序对象
        const program = gl.createProgram();
        gl.attachShader(program, vertexShader);
        gl.attachShader(program, fragmentShader);

        // 链接
        gl.linkProgram(program);
        gl.useProgram(program);

        // 动态传递点数据
        const posLocation = gl.getAttribLocation(program, 'aPos');
        const posLocation1 = gl.getAttribLocation(program, 'aPos1');
        const offset = [0.5, 0.5];
        const offset1 = [0.1, 0.3];
        gl.vertexAttrib2f(posLocation,...offset);
        gl.vertexAttrib2f(posLocation,...offset1);

        // 绘制
        gl.drawArrays(gl.POINTS, 0, 1);
    </script>
第三节 缓冲区和画线
这一节要复杂一点儿。我们要画线了!
我们先把片元着色器的内容,改成如下这种看起来比较标准的样子:
<!-- 顶点着色器--><script id="vertex-shader" type="x-shader/x-vertex">
        attribute vec2 aPosition;
        void main(){
            gl_Position = vec4(aPosition, 0.0, 1.0);
        }
</script>
然后,删去上节在 JS 里添加的内容,在顶点缓冲区的【链接】下添加如下内容:
const vertices = new Float32Array([  // 一个类型化数组,定义画线的坐标,32 位浮点数,每个元素占 4 字节
    -0.5, -0.5,  // 第一个点的 x & y 坐标
    0.5, 0.5,  // 第二个点的 x & y 坐标
]);

// 将坐标绑定到缓冲区
const buffer = gl.createBuffer();  // 创建缓冲区对象
gl.bindBuffer(gl.ARRAY_BUFFER, buffer);  // 将 buffer 缓冲区对象绑定到 ARRAY_BUFFER
gl.bufferData(gl.ARRAY_BUFFER, vertices, gl.STATIC_DRAW);  // 将 vertices(线的坐标)数据储存到 ARRAY_BUFFER

const posLocation = gl.getAttribLocation(program, 'aPosition');

// 告诉解析器,怎么解析我们缓冲区里面的数据
gl.vertexAttribPointer(
        posLocation,  // 属性
        2,  // 每个顶点属性,使用几个元素,(这里是 x,y ,两个)
        gl.FLOAT,  // 数据类型,浮点型
        false, // 数据是否标准化(这里是 不标准)
        2 * Float32Array.BYTES_PER_ELEMENT,  // 跨度
        0  // 从哪里开始
    );
gl.enableVertexAttribArray(posLocation);  // 激活顶点属性数组

// 绘制
gl.drawArrays(gl.LINES, 0, 2);
类型化数组
首先是 Float32Array 这个特殊的数组。我们平时在 js 里使用的 Array 数组和这个不一样。这是【类型化数组】:
- 【类型化数组】通常用于高数据量、高性能操作。如图片、音频、视频、文件等。
- 【类型化数组】和 普通数组 不一样,每个元素的类型都统一,不像普通数组,什么都能往里面塞。
- 【类型化数组】是操作和处理二进制数据的对象。
- 【类型化数组】是专有的方法,不具备普通数组的
pop、push、slice等方法
正因为它高效,所以我们在 webGL 里广泛使用 类型化数组。
以下是常见的 类型化数组:
Int8Array : 8位有符号整数,每个元素占 1 字节。
Uint8Array : 8 位无符号整数,每个元素占 1 字节。
Uint8clampedArray : 8 位无符号整数(固定值,溢出时值被截断),每个元素占 1 字节。
Int16Array : 16 位有符号整数,每个元素占 2 字节。
Uint16Array : 16 位无符号整数,每个元素占 2 字节。
Int32Array : 32 位有符号整数,每个元素占 4 字节。
Uint32Array : 32 位无符号整数,每个元素占 4 字节。
Float32Array : 32 位 IEEE754 浮点数,每个元素占 4 字节。
Float64Array : 64 位 IEEE754 浮点数,每个元素占 8 字节。
我们在这里,使用类型化数组,定义了我们要画的线的两个点的坐标。
由于我们传的是好几个点的顶点数据,所以我们就不使用上节的 vertexAttrib2f,而是使用 vertexAttribPointer。它会帮我们把很多点,解析好。那么它是怎么解析的呢?就是这样:
gl.vertexAttribPointer(
        posLocation,  // 属性
        2,  // 每个顶点属性,使用几个元素,(这里是 x,y ,两个)
        gl.FLOAT,  // 数据类型,浮点型
        false, // 数据是否标准化(这里是 不标准)
        2 * Float32Array.BYTES_PER_ELEMENT,  // 跨度
        0  // 从哪里开始
    );
意思很明确,告诉解析器,我们的顶点数据(名为 vertices 的那个类型化数组),是浮点型的,每个点是两个元素,从 0 位开始解析,每次跨越 2 4 个字节数(`2 Float32Array.BYTES_PER_ELEMENT`)。
其中 Float32Array.BYTES_PER_ELEMENT 是一个常量,代表每个元素是 4 个字节。将这种代码写入参数里,不算很智能,但也确实意思明确。
之后是例行的一个激活(enableVertexAttribArray(posLocation)),没什么要说的,反正写上就行。然后是绘制了。
绘制的方式
webGL 不仅可以画点,也可以画线,现在来细讲一下 webGL 里的几种绘制方式:
gl.drawArrays(mode, first, count);
- mode :怎么绘制,画点?画线?画三角?...
- first:从数组哪里开始画
- count:画几个顶点
而 mode 有很多常量:
- gL.POINTS: 点
- gL.LINES: 不连接的线段。
- gL.LINE_STRIP: 连接的线段。
- gL.LINE_LOOP: 闭合的线段环。
- gL.TRIANGLES: 不连接的三角形、
- gL.TRIANGLE_STRIP: 绘制一个三角形条带。
- gL.TRIANGLE_FAN: 三角形扇形
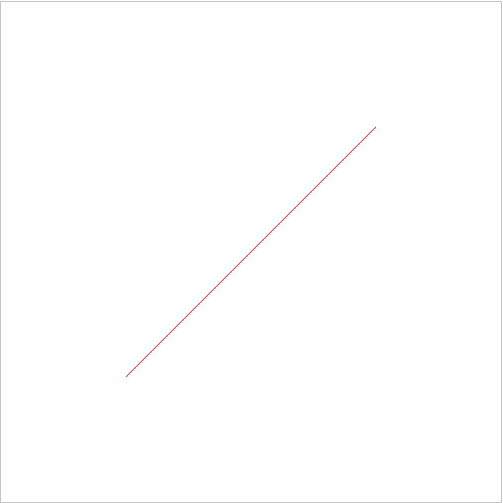
在本节,我们选择的是 gL.LINES 画线。最终的效果如下:

完整代码
本节的完整代码:
    <canvas class="canvas" width="500" height="500"></canvas>

    <!-- 顶点着色器--><script id="vertex-shader" type="x-shader/x-vertex">
        attribute vec2 aPosition;
        void main(){
            gl_Position = vec4(aPosition, 0.0, 1.0);
        }
    </script>

    <!-- 片元着色器--><script id="fragment-shader" type="x-shader/x-fragment">

        void main(){
            gl_FragColor = vec4(1.0, 0.0, 0.0, 1.0);  // 红色
        }
    </script>
    <script>
        const canvas = document.querySelector('.canvas');
        const gl = canvas.getContext('webgl');

        // 创建顶点着色器和片元着色器
        const vertexShader = gl.createShader(gl.VERTEX_SHADER);
        const fragmentShader = gl.createShader(gl.FRAGMENT_SHADER);

        // 创建着色器源码
        const vertexSource = document.getElementById('vertex-shader').innerText;
        const fragmentSource = document.getElementById('fragment-shader').innerText;

        //绑定着色器源码
        gl.shaderSource(vertexShader, vertexSource);
        gl.shaderSource(fragmentShader, fragmentSource);

        // 编译着色器源码
        gl.compileShader(vertexShader);
        gl.compileShader(fragmentShader);

        // 创建程序对象
        const program = gl.createProgram();
        gl.attachShader(program, vertexShader);
        gl.attachShader(program, fragmentShader);

        // 链接
        gl.linkProgram(program);
        gl.useProgram(program);

        const vertices = new Float32Array([
            -0.5,
            -0.5,  // 第一个点的 x & y 坐标
            0.5,
            0.5,  // 第二个点的 x & y 坐标
        ]);
        const buffer = gl.createBuffer();
        gl.bindBuffer(gl.ARRAY_BUFFER, buffer);
        gl.bufferData(gl.ARRAY_BUFFER, vertices, gl.STATIC_DRAW);

        const posLocation = gl.getAttribLocation(program, 'aPosition');

        // 告诉解析器,怎么解析我们缓冲区里面的数据
        gl.vertexAttribPointer(posLocation, 2, gl.FLOAT, false, 2 * Float32Array.BYTES_PER_ELEMENT, 0);

        gl.enableVertexAttribArray(posLocation);  // 启用顶点属性数组

        // 绘制
        gl.drawArrays(gl.LINES, 0, 2);
    </script>
第四节 彩色线段
上面,我们知道了【顶点着色器】怎么和 js 互动,那么现在我们再学一下【片元着色器】。可能和我们想象的略有不同。
首先,我们还是和画点一样,做两件事情:
- js 可把点的颜色,传入顶点着色器
- 顶点着色器接收 js 的点的颜色数据,然后片元着色器里再在【顶点着色器】的基础上接收颜色数据(使用
varying)。
首先第一点,在 js 的顶点缓冲区,添加如下内容:
const colors = new Float32Array([
    0.0, 0.0, 0.0, 1.0,  // 第一个点的 RGBA 颜色  // 注意,最后一个值是透明度,一般我们要写成 1.0
    1.0, 0.0, 0.0, 1.0,  // 第二个点的 RGBA 颜色
]);
const colorLocation = gl.getAttribLocation(program, 'aColor');  // 获取属性
const colorBuffer = gl.createBuffer();  // 创建缓冲区对象
gl.bindBuffer(gl.ARRAY_BUFFER, colorBuffer);  // 缓冲区被绑定
gl.bufferData(gl.ARRAY_BUFFER, colors, gl.STATIC_DRAW);  // 将颜色储存到缓冲区
gl.vertexAttribPointer(colorLocation, 4, gl.FLOAT, false, 4 * Float32Array.BYTES_PER_ELEMENT, 0);  // 告诉解析器,如何解析我们的数据
gl.enableVertexAttribArray(colorLocation);  // 激活
下面是着色器,可以看到,和上面的画线,操作一模一样。但是在 GLSL 里就不一样了:
<!-- 顶点着色器--><script id="vertex-shader" type="x-shader/x-vertex">
        attribute vec2 aPosition;
        attribute vec4 aColor;
        varying vec4 vColor;
        void main(){
            gl_Position = vec4(aPosition, 0.0, 1.0);
            vColor = aColor;
        }
    </script>

    <!-- 片元着色器--><script id="fragment-shader" type="x-shader/x-fragment">
        precision highp float;  // 声明精度
        varying vec4 vColor;
        void main(){
            gl_FragColor = vColor;
        }
    </script>
我们没有在【片元着色器】里直接写 attribute 里,因为传递的值只能先到【顶点着色器】。另外,【顶点着色器】的 vColor 可以被传递到【片元着色器】。
综上段所述,颜色只能这样二次传递,才能到达【顶点着色器】。因为我们上文说过,varying: 用于在顶点着色器和片段着色器之间传递插值数据。
colors --> aColor --> vColor当然,一定要注意一点,RGBA 是一个有着四个值的颜色表示法,最后那个是指的 alpha,也就是透明度,如果不是特殊要求,我们一般都是不透明,也就是写成 1.0 。要注意这一点,否则可能会出现某些错误,但怎么也找不到原因。
精度修饰符
precision 是一个修饰符,用于声明变量的默认修饰精度,GLSL 支持三种精度:
- highp (高精度) : 通常用 32 位表示,适用于如位置计算、复杂的物理效果等
- mediump (中精度) : 通常用 16 位表示,适用于纹理坐标等
- lowp (低精度) : 通常用 10 位表示,适用于计算颜色值等
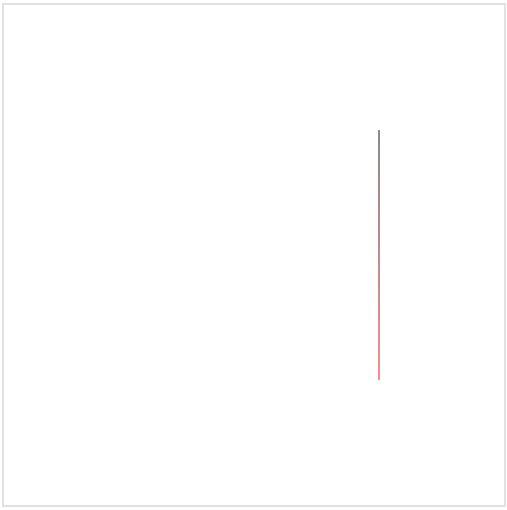
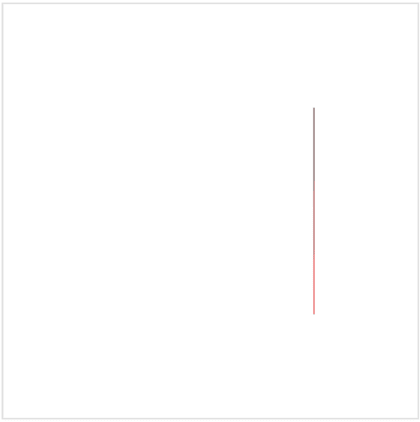
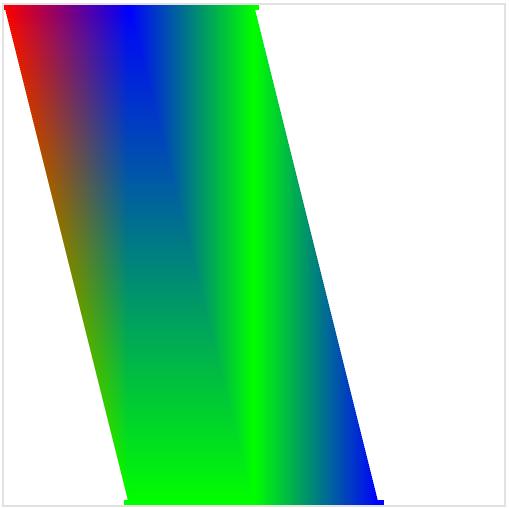
最终的效果如下,一个漂亮的渐变线条:
完整代码
完整代码如下:
    <canvas class="canvas" width="500" height="500"></canvas>

    <!-- 顶点着色器--><script id="vertex-shader" type="x-shader/x-vertex">
        attribute vec2 aPosition;
        attribute vec4 aColor;
        varying vec4 vColor;
        void main(){
            gl_Position = vec4(aPosition, 0.0, 1.0);
            vColor = aColor;
        }
    </script>

    <!-- 片元着色器--><script id="fragment-shader" type="x-shader/x-fragment">
        precision highp float;  // 声明精度
        varying vec4 vColor;
        void main(){
            gl_FragColor = vColor;  // 红色
        }
    </script>
    <script>
        const canvas = document.querySelector('.canvas');
        const gl = canvas.getContext('webgl');

        // 创建顶点着色器和片元着色器
        const vertexShader = gl.createShader(gl.VERTEX_SHADER);
        const fragmentShader = gl.createShader(gl.FRAGMENT_SHADER);

        // 创建着色器源码
        const vertexSource = document.getElementById('vertex-shader').innerText;
        const fragmentSource = document.getElementById('fragment-shader').innerText;

        //绑定着色器源码
        gl.shaderSource(vertexShader, vertexSource);
        gl.shaderSource(fragmentShader, fragmentSource);

        // 编译着色器源码
        gl.compileShader(vertexShader);
        gl.compileShader(fragmentShader);

        // 创建程序对象
        const program = gl.createProgram();
        gl.attachShader(program, vertexShader);
        gl.attachShader(program, fragmentShader);

        // 链接
        gl.linkProgram(program);
        gl.useProgram(program);

        const vertices = new Float32Array([
            0.5,
            0.5,  // 第一个点的 x & y 坐标
            0.5,
            -0.5,  // 第二个点的 x & y 坐标
        ]);
        const colors = new Float32Array([
            0.0, 0.0, 0.0, 1.0,  // 注意,最后一个值是透明度,一般我们要写成 1.0
            1.0, 0.0, 0.0, 1.0,
        ]);
        const buffer = gl.createBuffer();
        gl.bindBuffer(gl.ARRAY_BUFFER, buffer);
        gl.bufferData(gl.ARRAY_BUFFER, vertices, gl.STATIC_DRAW);

        const posLocation = gl.getAttribLocation(program, 'aPosition');

        // 告诉解析器,怎么解析我们缓冲区里面的数据
        gl.vertexAttribPointer(posLocation, 2, gl.FLOAT, false, 2 * Float32Array.BYTES_PER_ELEMENT, 0);

        gl.enableVertexAttribArray(posLocation);  // 启用顶点属性数组

        const colorLocation = gl.getAttribLocation(program, 'aColor');
        const colorBuffer = gl.createBuffer();
        gl.bindBuffer(gl.ARRAY_BUFFER, colorBuffer);
        gl.bufferData(gl.ARRAY_BUFFER, colors, gl.STATIC_DRAW);
        gl.vertexAttribPointer(colorLocation, 4, gl.FLOAT, false, 4 * Float32Array.BYTES_PER_ELEMENT, 0);
        gl.enableVertexAttribArray(colorLocation);

        // 绘制
        gl.drawArrays(gl.LINES, 0, 2);
    </script>
第五节 单个 buffer 渲染颜色
这一节的显示效果,和前面一样,只不过我们是把写法优化一下。把顶点的坐标和颜色写到一个文件里,并告诉解析器怎么解析这个复杂的顶点数据。也就是怎么用好 vertexAttribPointer() 这个函数。
好,现在我们把 顶点坐标 和 顶点颜色 写到一个数组里,注释之前那个颜色数组:
const vertices = new Float32Array([
    0.5, 0.5,  // 第一个点的 x & y 坐标
    0.0, 0.0, 0.0, 1.0,  // 第一个点的颜色
    0.5, -0.5,  // 第二个点的 x & y 坐标
    1.0, 0.0, 0.0, 1.0,  // 第二个点的颜色
]);
// const colors = new Float32Array([
//     0.0, 0.0, 0.0, 1.0,
//     1.0, 0.0, 0.0, 1.0,
// ]);
之后,两者的 buffer 合二为一了:
// 坐标的缓冲区
const posLocation = gl.getAttribLocation(program, 'aPosition');
gl.vertexAttribPointer(posLocation, 2, gl.FLOAT, false, 6 * Float32Array.BYTES_PER_ELEMENT, 0);  // 将跨度由 2 个单位,改成 6 个单位

// 颜色的缓冲区
const colorLocation = gl.getAttribLocation(program, 'aColor');
gl.vertexAttribPointer(colorLocation, 4, gl.FLOAT, false, 6 * Float32Array.BYTES_PER_ELEMENT, 2 * Float32Array.BYTES_PER_ELEMENT);
gl.enableVertexAttribArray(colorLocation);
我们来对比一下颜色缓冲区的修改前后两者的 vertexAttribPointer():
gl.vertexAttribPointer(colorLocation, 4, gl.FLOAT, false, 4 * Float32Array.BYTES_PER_ELEMENT, 0);
// 修改后:
gl.vertexAttribPointer(colorLocation, 4, gl.FLOAT, false, 6 * Float32Array.BYTES_PER_ELEMENT, 2 * Float32Array.BYTES_PER_ELEMENT);
我们修改的是最后那个参数,那个参数的意思是“从哪里开始”。
于是,我们就可以在一个数组里,传入两种信息了!
完整代码
本节的完整代码为:
<canvas class="canvas" width="500" height="500"></canvas>

<!-- 顶点着色器--><script id="vertex-shader" type="x-shader/x-vertex">
    attribute vec2 aPosition;
    attribute vec4 aColor;
    varying vec4 vColor;
    void main(){
        gl_Position = vec4(aPosition, 0.0, 1.0);
        vColor = aColor;
    }
</script>

<!-- 片元着色器--><script id="fragment-shader" type="x-shader/x-fragment">
    precision highp float;  // 声明精度
    varying vec4 vColor;
    void main(){
        gl_FragColor = vColor;  // 红色
    }
</script>
<script>
    const canvas = document.querySelector('.canvas');
    const gl = canvas.getContext('webgl');

    // 创建顶点着色器和片元着色器
    const vertexShader = gl.createShader(gl.VERTEX_SHADER);
    const fragmentShader = gl.createShader(gl.FRAGMENT_SHADER);

    // 创建着色器源码
    const vertexSource = document.getElementById('vertex-shader').innerText;
    const fragmentSource = document.getElementById('fragment-shader').innerText;

    //绑定着色器源码
    gl.shaderSource(vertexShader, vertexSource);
    gl.shaderSource(fragmentShader, fragmentSource);

    // 编译着色器源码
    gl.compileShader(vertexShader);
    gl.compileShader(fragmentShader);

    // 创建程序对象
    const program = gl.createProgram();
    gl.attachShader(program, vertexShader);
    gl.attachShader(program, fragmentShader);

    // 链接
    gl.linkProgram(program);
    gl.useProgram(program);

    const vertices = new Float32Array([
    0.5, 0.5,  // 第一个点的 x & y 坐标
    0.0, 0.0, 0.0, 1.0,  // 第一个点的颜色
    0.5, -0.5,  // 第二个点的 x & y 坐标
    1.0, 0.0, 0.0, 1.0,  // 第二个点的颜色
    ]);
    // const colors = new Float32Array([
    //     0.0, 0.0, 0.0, 1.0,
    //     1.0, 0.0, 0.0, 0.0,
    // ]);

    const buffer = gl.createBuffer();
    gl.bindBuffer(gl.ARRAY_BUFFER, buffer);
    gl.bufferData(gl.ARRAY_BUFFER, vertices, gl.STATIC_DRAW);

    const posLocation = gl.getAttribLocation(program, 'aPosition');
    gl.vertexAttribPointer(posLocation, 2, gl.FLOAT, false, 6 * Float32Array.BYTES_PER_ELEMENT, 0);
    gl.enableVertexAttribArray(posLocation);  // 启用顶点属性数组

    const colorLocation = gl.getAttribLocation(program, 'aColor');
    gl.vertexAttribPointer(colorLocation, 4, gl.FLOAT, false, 6 * Float32Array.BYTES_PER_ELEMENT, 2 * Float32Array.BYTES_PER_ELEMENT);
    gl.enableVertexAttribArray(colorLocation);

    // 绘制
    gl.drawArrays(gl.LINES, 0, 2);
</script>
第六节 抽离代码 & 画彩色三角形
现在,我们来到 WebGL 的经典的画三角形了!
首先,我们前面有很多代码很赘余,属于固定搭配,不需要每次编码都从头写,所以,我们就以模块式的方式将其抽离出去(当然,这个不是 WebGL 的必备知识,可以忽略这个步骤):
我们在本目录建立一个文件夹 utiles,在里面添加一个 js 文件 initShader.js,也就是 './utiles/initShader.js',然后我们写入以下内容:
export default function(gl){
    // 创建顶点着色器和片元着色器
    const vertexShader = gl.createShader(gl.VERTEX_SHADER);
    const fragmentShader = gl.createShader(gl.FRAGMENT_SHADER);

    // 创建着色器源码
    const vertexSource = document.getElementById('vertex-shader').innerText;
    const fragmentSource = document.getElementById('fragment-shader').innerText;

    //绑定着色器源码
    gl.shaderSource(vertexShader, vertexSource);
    gl.shaderSource(fragmentShader, fragmentSource);

    // 编译着色器源码
    gl.compileShader(vertexShader);
    gl.compileShader(fragmentShader);

    // 创建程序对象
    const program = gl.createProgram();
    gl.attachShader(program, vertexShader);
    gl.attachShader(program, fragmentShader);

    // 链接
    gl.linkProgram(program);
    gl.useProgram(program);

    return program;
}
这样,我们的主文件,就可以这样轻松写了,不用搞那么一大堆了:
<script type="module">  // 注意,这里一定要写 'module' !!!
    import initShader from './utiles/initShader.js';  // 引入我们的初始化着色器模块
    const canvas = document.querySelector('.canvas');
    const gl = canvas.getContext('webgl');
    const program = initShader(gl);  // 程序对象直接就生成了
然后,就是画三角形了。
三角形的点很少,就三个,这是我们的点数据:
const vertices = new Float32Array([
    -0.5, -0.5, 1.0, 0.0, 0.0, 1.0,  // 第一个点的坐标和颜色
    0.5, -0.5, 0.0, 1.0, 0.0, 1.0,  // 第二个
    -0.0, 0.5, 0.0, 0.0, 1.0, 1.0,  // 第三个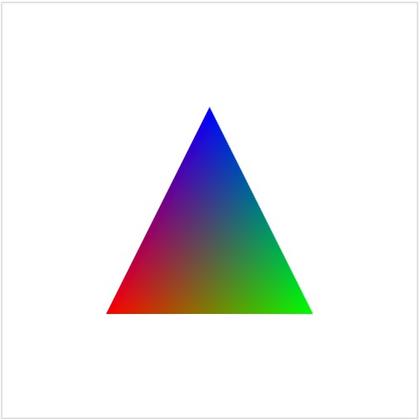
]);然后,绘制方式,就不是【线条】(LINES)了,而是【三角形】(TRIANGLES)了。
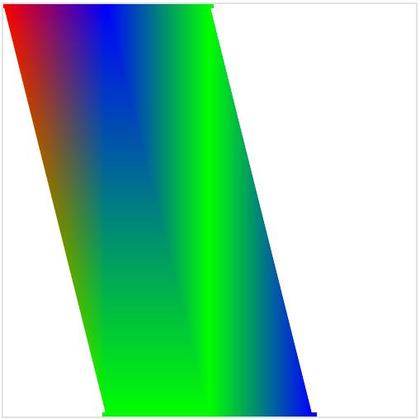
gl.drawArrays(gl.TRIANGLES, 0, 3);最终呈现的效果如图所示:
完整代码
本节的完整代码为:
<canvas class="canvas" width="500" height="500"></canvas>

<!-- 顶点着色器--><script id="vertex-shader" type="x-shader/x-vertex">
    attribute vec2 aPosition;
    attribute vec4 aColor;
    varying vec4 vColor;
    void main(){
        gl_Position = vec4(aPosition, 0.0, 1.0);
        vColor = aColor;
    }
</script>

<!-- 片元着色器--><script id="fragment-shader" type="x-shader/x-fragment">
    precision highp float;  // 声明精度
    varying vec4 vColor;
    void main(){
        gl_FragColor = vColor;  // 红色
    }
</script>
<script type="module">
    import initShader from './utiles/initShader.js';
    const canvas = document.querySelector('.canvas');
    const gl = canvas.getContext('webgl');
    const program = initShader(gl);

    const vertices = new Float32Array([
        -0.5, -0.5, 1.0, 0.0, 0.0, 1.0,
        0.5, -0.5, 0.0, 1.0, 0.0, 1.0,
        -0.0, 0.5, 0.0, 0.0, 1.0, 1.0,
    ]);

    const buffer = gl.createBuffer();
    gl.bindBuffer(gl.ARRAY_BUFFER, buffer);
    gl.bufferData(gl.ARRAY_BUFFER, vertices, gl.STATIC_DRAW);

    const posLocation = gl.getAttribLocation(program, 'aPosition');
    const colorLocation = gl.getAttribLocation(program, 'aColor');

    // 顶点
    gl.vertexAttribPointer(posLocation, 2, gl.FLOAT, false, 6 * Float32Array.BYTES_PER_ELEMENT, 0);
    gl.enableVertexAttribArray(posLocation);  // 启用顶点属性数组

    // 颜色
    gl.vertexAttribPointer(colorLocation, 4, gl.FLOAT, false, 6 * Float32Array.BYTES_PER_ELEMENT, 2 * Float32Array.BYTES_PER_ELEMENT);
    gl.enableVertexAttribArray(colorLocation);

    // 绘制
    gl.drawArrays(gl.TRIANGLES, 0, 3);
</script>
第七节 图元的七种绘制方式
上面有举例,webGL 里的几种绘制方式。
现在我们来简单逐个试一下:
我们先创建 6 个点:
const vertices = new Float32Array([
    -1.0, 1.0, 1.0, 0.0, 0.0, 1.0,
    -0.5, -1.0, 0.0, 1.0, 0.0, 1.0,
    -0.5, 1.0, 0.0, 0.0, 1.0, 1.0,
    0.0, -1.0, 0.0, 1.0, 0.0, 1.0,
    0.0, 1.0, 0.0, 1.0, 0.0, 1.0,
    0.5, -1.0, 0.0, 0.0, 1.0, 1.0,
]);
然后,把这 6 个点都显示出来。
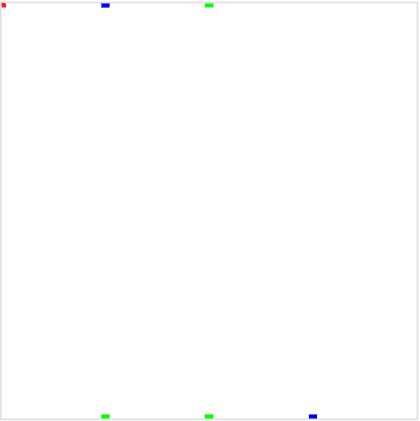
gl.drawArrays(gl.POINTS, 0, 6); 这是最基本的点:
保留这 6 个点,我们向下追加代码,使用其他方式绘制。
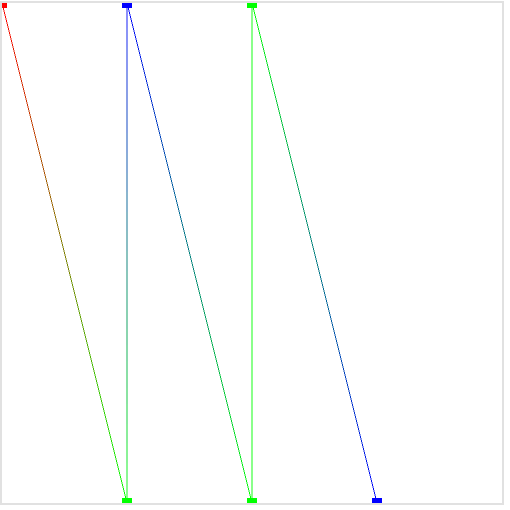
gl.drawArrays(gl.LINES, 0, 6); 每两个顶点点,画一次线,顶点不重复使用:
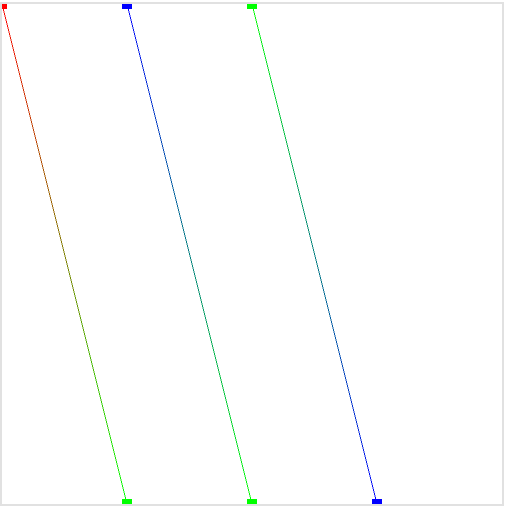
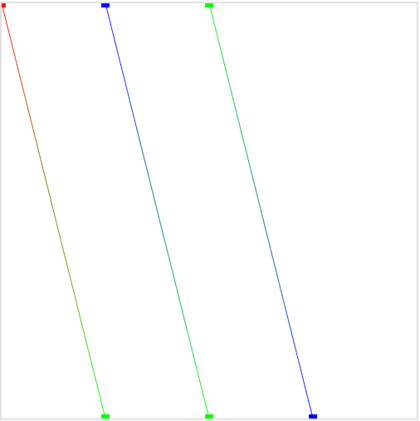
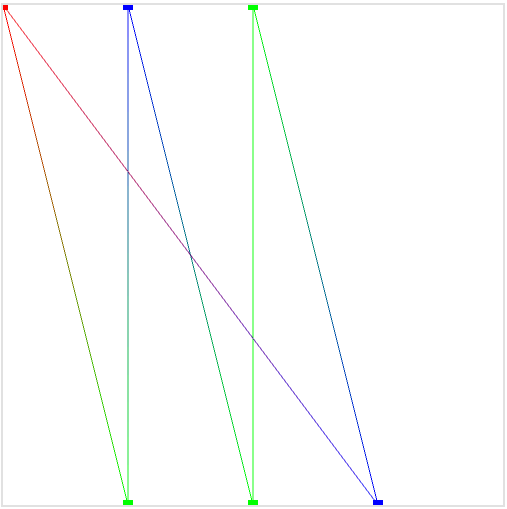
gl.drawArrays(gl.LINE_STRIP, 0, 6);,顶点可以重复使用,但不闭合:

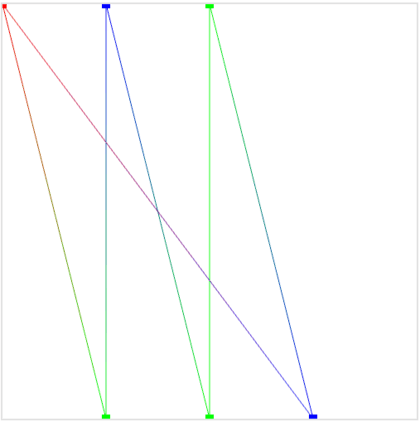
gl.drawArrays(gl.LINE_LOOP, 0, 6);,顶点可以重复使用的绘制线条,且闭合:
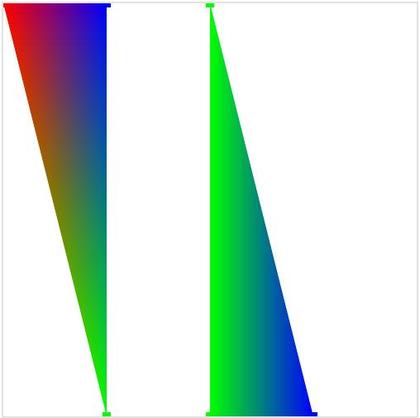
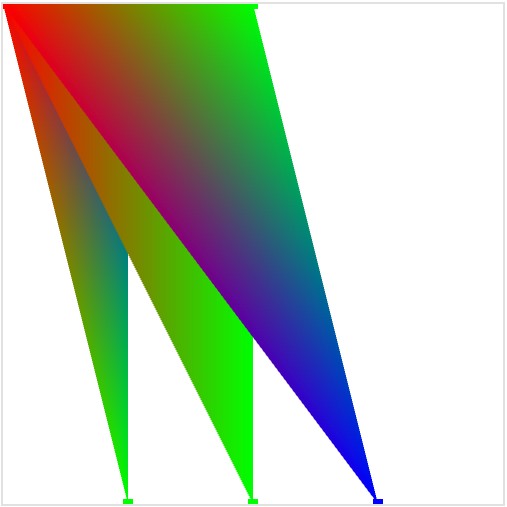
gl.drawArrays(gl.TRIANGLES, 0, 6); ,顶点不重复使用,绘制三角形:
gl.drawArrays(gl.TRIANGLE_FAN, 0, 6);,顶点可重复使用,绘制三角形(是的,绘制多边形,其实就是绘制多个三角形):
gl.drawArrays(gl.TRIANGLE_STRIP, 0, 6);,绘制一个三角形条带(换言之,都基于第一个点来画三角形):

完整代码
以下是完整代码:
<canvas class="canvas" width="500" height="500"></canvas>

<!-- 顶点着色器--><script id="vertex-shader" type="x-shader/x-vertex">
    attribute vec2 aPosition;
    attribute vec4 aColor;
    varying vec4 vColor;
    void main(){
        gl_Position = vec4(aPosition, 0.0, 1.0);
        gl_PointSize = 10.0;
        vColor = aColor;
    }
</script>

<!-- 片元着色器--><script id="fragment-shader" type="x-shader/x-fragment">
    precision highp float;  // 声明精度
    varying vec4 vColor;
    void main(){
        gl_FragColor = vColor;  // 红色
    }
</script>
<script type="module">
    import initShader from './utiles/initShader.js';
    const canvas = document.querySelector('.canvas');
    const gl = canvas.getContext('webgl');
    const program = initShader(gl);

    const vertices = new Float32Array([
        -1.0, 1.0, 1.0, 0.0, 0.0, 1.0,
        -0.5, -1.0, 0.0, 1.0, 0.0, 1.0,
        -0.5, 1.0, 0.0, 0.0, 1.0, 1.0,
        0.0, -1.0, 0.0, 1.0, 0.0, 1.0,
        0.0, 1.0, 0.0, 1.0, 0.0, 1.0,
        0.5, -1.0, 0.0, 0.0, 1.0, 1.0,
    ]);

    const buffer = gl.createBuffer();
    gl.bindBuffer(gl.ARRAY_BUFFER, buffer);
    gl.bufferData(gl.ARRAY_BUFFER, vertices, gl.STATIC_DRAW);

    const posLocation = gl.getAttribLocation(program, 'aPosition');
    const colorLocation = gl.getAttribLocation(program, 'aColor');

    // 顶点
    gl.vertexAttribPointer(posLocation, 2, gl.FLOAT, false, 6 * Float32Array.BYTES_PER_ELEMENT, 0);
    gl.enableVertexAttribArray(posLocation);

    // 颜色
    gl.vertexAttribPointer(colorLocation, 4, gl.FLOAT, false, 6 * Float32Array.BYTES_PER_ELEMENT, 2 * Float32Array.BYTES_PER_ELEMENT);
    gl.enableVertexAttribArray(colorLocation);

    // 绘制
    gl.drawArrays(gl.POINTS, 0, 6);  // 点
    // gl.drawArrays(gl.LINES, 0, 6);  // 线
    // gl.drawArrays(gl.LINE_STRIP, 0, 6);  // 连续的线
    // gl.drawArrays(gl.LINE_LOOP, 0, 6);  // 闭合的线
    // gl.drawArrays(gl.TRIANGLES, 0, 6);  // 三角形
    // gl.drawArrays(gl.TRIANGLE_STRIP, 0, 6);  // 三角形条带
    // gl.drawArrays(gl.TRIANGLE_FAN, 0, 6);  // 三角形扇形(都以第一个点来画三角形)
</script>
第八节 uniform 传值变换数据
绘制相关的基本内容,已经讲完,现在就是变换了。
在上面,我们用过了 attribute、varying、precision 等变量修饰符,现在我们来使用上面提到过的 uniform 修饰符。
上面说,uniform 定义在整个渲染过程中保持不变的变量,常用于传递变换矩阵、光照参数等,所以它就像常量一样。
我们这一节,就来学习形状的偏移(比如 正方形 的移动)!所谓偏移,其实就是两个向量相加!
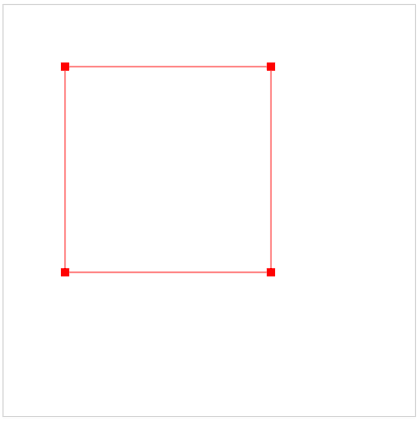
我们先画一个正方形,关键代码如下:
const vertices = new Float32Array([  // 正方形的四个顶点
    -0.5, 0.5,
    -0.5, -0.5,
    0.5, -0.5,
    0.5, 0.5,
]);

// ***

// 绘制
gl.drawArrays(gl.POINTS, 0, 4);
gl.drawArrays(gl.LINE_LOOP, 0, 4);
这样,一个正方形就出现了。接着我们在缓冲区向着色器传入一个偏移值,和前面用过的 attribute 传值大法差不多。只不过,配套的两个函数变成了 uniform 家的那种。
const translationLocation = gl.getUniformLocation(program, 'uTranslate');  // 获取属性
const translation = [-0.2, 0.2];  // 偏移内容
gl.uniform2fv(translationLocation, translation);  // 传入着色器
那么我们在着色器,怎么接收呢?如下代码:
attribute vec2 aPosition;
uniform vec2 uTranslate;  // 我们要接收的偏移值
void main(){
    vec2 newPos = uTranslate + aPosition;  // 两个 向量 相加,就是所谓 偏移
    gl_Position = vec4(newPos, 0.0, 1.0);
    gl_PointSize = 10.0;
}
这是最终结果:
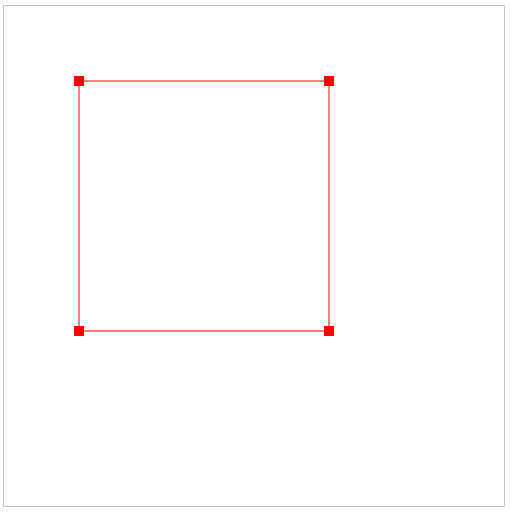
正方形,向左上偏移了一点。
完整代码
下面是本节的完整代码:
    <canvas class="canvas" width="500" height="500"></canvas>

    <!-- 顶点着色器--><script id="vertex-shader" type="x-shader/x-vertex">
        attribute vec2 aPosition;
        uniform vec2 uTranslate;
        void main(){
            vec2 newPos = uTranslate + aPosition;
            gl_Position = vec4(newPos, 0.0, 1.0);
            gl_PointSize = 10.0;
        }
    </script>

    <!-- 片元着色器--><script id="fragment-shader" type="x-shader/x-fragment">
        precision highp float;  // 声明精度
        varying vec4 vColor;
        void main(){
            gl_FragColor = vec4(1.0, 0.0, 0.0, 1.0);
        }
    </script>
    <script type="module">
        import initShader from './utiles/initShader.js';
        const canvas = document.querySelector('.canvas');
        const gl = canvas.getContext('webgl');
        const program = initShader(gl);

        const vertices = new Float32Array([
            -0.5, 0.5,
            -0.5, -0.5,
            0.5, -0.5,
            0.5, 0.5,
        ]);

        const buffer = gl.createBuffer();
        gl.bindBuffer(gl.ARRAY_BUFFER, buffer);
        gl.bufferData(gl.ARRAY_BUFFER, vertices, gl.STATIC_DRAW);

        const posLocation = gl.getAttribLocation(program, 'aPosition');
        const translationLocation = gl.getUniformLocation(program, 'uTranslate');
        const translation = [-0.2, 0.2];
        gl.uniform2fv(translationLocation, translation);

        gl.vertexAttribPointer(posLocation, 2, gl.FLOAT, false, 2 * Float32Array.BYTES_PER_ELEMENT, 0);
        gl.enableVertexAttribArray(posLocation);

        // 绘制
        gl.drawArrays(gl.POINTS, 0, 4);
        gl.drawArrays(gl.LINE_LOOP, 0, 4);
    </script>
第九节 旋转矩阵
既然能上下左右偏移,那就可以旋转。但旋转可没那么轻松。
使用三角函数来推导公式
如果有一个点 A(x1, y1)。旋转 n 度后,形成 A' (x2, y2)。我们知道 x1、y1、n,怎么求 x2,y2 ?
这是一道中学的数学题目,我们需要数学里的三角函数。
我们把图画出来,发现里面有两个三角形:
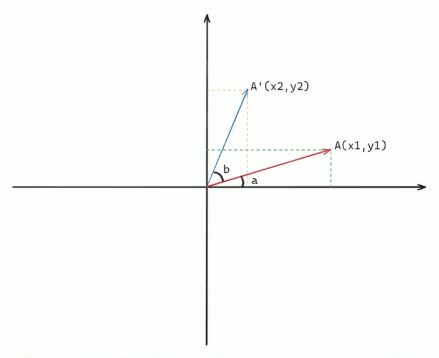

我们先看躺着的三角形,设三角形最长边为 r,根据基本的三角函数,我们可以使用它们推断出 x1、y1 的值:
x1 = r * cosa
y1 = r * sina
我们现在的目的是,求立着的三角形的两个坐标 x2、y2。
根据三角函数里的倍角公式,我们可以这样推导:
x2 = r * cos(a + b)
   = r * (cosa * cosb - sina * sinb)
   = r * cosa * cosb - r * sina * sinb
   = x1 * cosb - y1 * sinb
y2 = r * sin(a + b)
   = r * (sina * cosb + sinb * cosa)
   = r * sina * cosb + r * sinb * cosa
   = y1 * cosb + x1 * sinb

x2 = x1 * cosb - y1 * sinb
y2 = y1 * cosb + x1 * sinb
好,现在我们证明出来了。如果我们需要将其完美的融入到程序里去,我们需要用到矩阵。
矩阵
我们来简单讲一下矩阵的基础知识,下面是一个矩阵的相加 :
两个矩阵如果要相加,则必须要有相同的维度。然后每个相同位置的元素相加即可。
两个矩阵如果要相乘,则不需要相同的元素。但第一个元素的每行的列数,必须等于第二个元素的行数:
其计算原理过程如下所示:
第一行:1 1 + 1 2 + 1 * 3 = 6
第二行:2 1 + 2 2 + 2 * 3 = 12
第三行:3 1 + 3 2 + 3 * 3 = 18
我们可以根据这个原理,简单的推导出一个适用于旋转的矩阵:
代码来实现
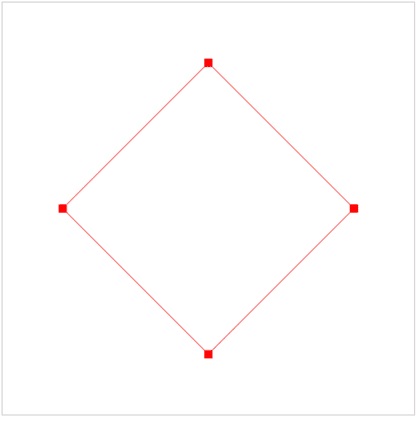
我们现在可以写代码了,还是上一节的四边形,现在我们只需将【顶点着色器】修改:
    <!-- 顶点着色器--><script id="vertex-shader" type="x-shader/x-vertex">
        attribute vec2 aPosition;
        void main(){
            float radian = radians(45.0);
            float sin = sin(radian);
            float cos = cos(radian);
            mat4 roatate =
            - mat4(  // 旋转矩阵
                cos, -sin, 0, 0,
                sin, cos, 0, 0,
                0, 0, 1, 0,
                0, 0, 0, 1
            );

            gl_Position = roatate * vec4(aPosition, 0.0, 1.0);
            gl_PointSize = 10.0;
        }
    </script>
这里又多了很多陌生的函数和修饰符。
- radians : 它可以将一个【角度】,转化为【弧度】
- sin cos :输入【弧度】,计算出 sin 值和 cos 值
- mat4 :4 维矩阵类型,除此还有 mat2、mat3
在 gl_Position 中,直接将矩阵和变量相乘即可。这样,我们就可以得到一个旋转 45 度的四边形了!
结果如下所示:
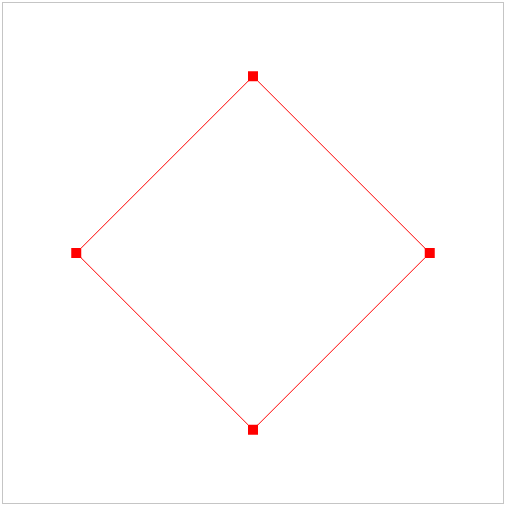
这便是 webGL 的变换基础,我们可以在 2D 上旋转,那就可以在 3D 上旋转。下面我们就要进入三维世界了!
三维旋转的三角函数矩阵
下面是 X Y Z 三个轴上的旋转矩阵,我们在后面的小节可以用到:
- 绕 X 轴旋转
- 绕 Y 轴旋转
- 绕 Z 轴旋转
完整代码
下面是本节的完整代码:
    <canvas class="canvas" width="500" height="500"></canvas>

    <!-- 顶点着色器--><script id="vertex-shader" type="x-shader/x-vertex">
        attribute vec2 aPosition;
        void main(){
            float radian = radians(45.0);
            float sin = sin(radian);
            float cos = cos(radian);
            mat4 roatate = mat4(  // 旋转矩阵
                cos, -sin, 0, 0,
                sin, cos, 0, 0,
                0, 0, 1, 0,
                0, 0, 0, 1
            );

            gl_Position = roatate * vec4(aPosition, 0.0, 1.0);
            gl_PointSize = 10.0;
        }
    </script>

    <!-- 片元着色器--><script id="fragment-shader" type="x-shader/x-fragment">
        precision highp float;  // 声明精度
        varying vec4 vColor;
        void main(){
            gl_FragColor = vec4(1.0, 0.0, 0.0, 1.0);
        }
    </script>
    <script type="module">
        import initShader from './utiles/initShader.js';
        const canvas = document.querySelector('.canvas');
        const gl = canvas.getContext('webgl');
        const program = initShader(gl);

        const vertices = new Float32Array([
            -0.5, 0.5,
            -0.5, -0.5,
            0.5, -0.5,
            0.5, 0.5,
        ]);

        const buffer = gl.createBuffer();
        gl.bindBuffer(gl.ARRAY_BUFFER, buffer);
        gl.bufferData(gl.ARRAY_BUFFER, vertices, gl.STATIC_DRAW);

        const posLocation = gl.getAttribLocation(program, 'aPosition');

        // 告诉解析器,怎么解析我们缓冲区里面的数据
        gl.vertexAttribPointer(posLocation, 2, gl.FLOAT, false, 2 * Float32Array.BYTES_PER_ELEMENT, 0);

        gl.enableVertexAttribArray(posLocation);  // 启用顶点属性数组

        // 绘制
        gl.drawArrays(gl.POINTS, 0, 4);
        gl.drawArrays(gl.LINE_LOOP, 0, 4);
    </script>
第十节 线框立方体
立方体有 8 个点,我们来把坐标写出来,然后绘制出来,关键的 js 代码为:
const vertices = new Float32Array([
            // 第一个四边形
            0.5, 0.5, 0.5,
            -0.5, 0.5, 0.5,
            -0.5, -0.5, 0.5,
            0.5, -0.5, 0.5,

            // 第二个四边形
            0.5, 0.5, -0.5,
            -0.5, 0.5, -0.5,
            -0.5, -0.5, -0.5,
            0.5, -0.5, -0.5,
]);

// ***

// 注意,现在是 3 维,每个元素使用三个值,且跨度为 3
gl.vertexAttribPointer(posLocation, 3, gl.FLOAT, false, 3 * Float32Array.BYTES_PER_ELEMENT, 0);

// ***

// 绘制第一个正方形
gl.drawArrays(gl.POINTS, 0, 4);
gl.drawArrays(gl.LINE_LOOP, 0, 4);

// 绘制第二个正方形
gl.drawArrays(gl.POINTS, 4, 4);
gl.drawArrays(gl.LINE_LOOP, 4, 4);
当然,我们也要把我们的三维矩阵放到着色器里:
attribute vec4 aPosition;
void main(){
float radian = radians(10.0);
float sin = sin(radian);
float cos = cos(radian);
mat4 mx = mat4( // 旋转矩阵
1, 0, 0, 0,
0, cos, -sin, 0,
0, sin, cos, 0,
0, 0, 0, 1
);
mat4 my = mat4( // 旋转矩阵
cos, 0, -sin, 0,
0, 1, 0, 0,
sin, 0, cos, 0,
0, 0, 0, 1
);
mat4 mz = mat4( // 旋转矩阵
cos, -sin, 0, 0,
sin, cos, 0, 0,
0, 0, 1, 0,
0, 0, 0, 1
);
gl_Position = mx * my * aPosition;
gl_PointSize = 10.0;
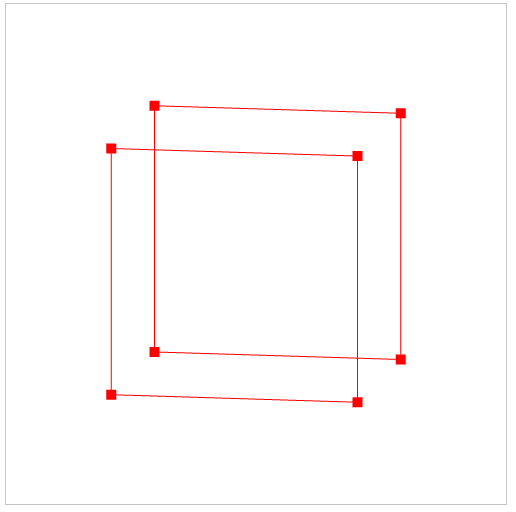
}画出来的图是这样的:
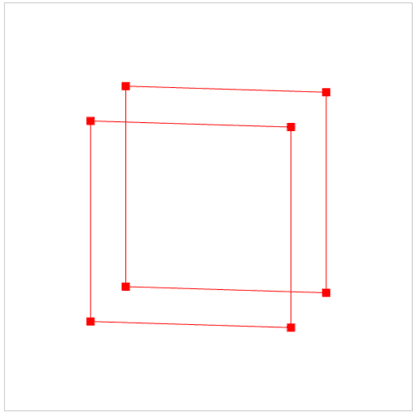
现在,还缺 4 根线。我们可以再添加四根线,现在的 vertices 是这个样子:
const vertices = new Float32Array([
// 第一个四边形
0.5, 0.5, 0.5,
-0.5, 0.5, 0.5,
-0.5, -0.5, 0.5,
0.5, -0.5, 0.5,
// 第二个四边形
0.5, 0.5, -0.5,
-0.5, 0.5, -0.5,
-0.5, -0.5, -0.5,
0.5, -0.5, -0.5,
0.5, 0.5, 0.5,
0.5, 0.5, -0.5,
-0.5, 0.5, 0.5,
-0.5, 0.5, -0.5,
-0.5, -0.5, 0.5,
-0.5, -0.5, -0.5,
0.5, -0.5, 0.5,
0.5, -0.5, -0.5,
]);
// **
// 下面再添加绘制动作
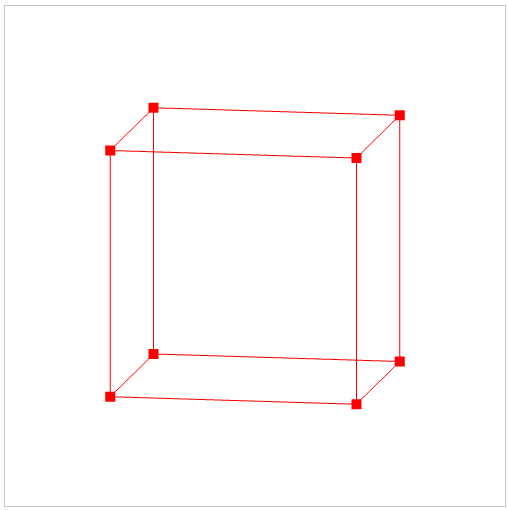
gl.drawArrays(gl.LINES, 8, 2 * 4); // 从第 8 组开始画线,一共画 8 个顶点效果如下:

我们的立方体,就这样被轻松的画了出来。
完整代码
下面是本节的完整代码。
    <canvas class="canvas" width="500" height="500"></canvas>

    <!-- 顶点着色器--><script id="vertex-shader" type="x-shader/x-vertex">
        attribute vec4 aPosition;
        void main(){
            float radian = radians(10.0);
            float sin = sin(radian);
            float cos = cos(radian);
            mat4 mx = mat4(  // X 轴 旋转矩阵
                1, 0, 0, 0,
                0, cos, -sin, 0,
                0, sin, cos, 0,
                0, 0, 0, 1
            );
            mat4 my = mat4(  // Y 轴 旋转矩阵
                cos, 0, -sin, 0,
                0, 1, 0, 0,
                sin, 0, cos, 0,
                0, 0, 0, 1
            );
            mat4 mz = mat4(  // Z 轴 旋转矩阵
                cos, -sin, 0, 0,
                sin, cos, 0, 0,
                0, 0, 1, 0,
                0, 0, 0, 1
            );

            gl_Position = mx * my * aPosition;
            gl_PointSize = 10.0;
        }
    </script>

    <!-- 片元着色器--><script id="fragment-shader" type="x-shader/x-fragment">
        precision highp float;  // 声明精度
        varying vec4 vColor;
        void main(){
            gl_FragColor = vec4(1.0, 0.0, 0.0, 1.0);
        }
    </script>
    <script type="module">
        import initShader from './utiles/initShader.js';
        const canvas = document.querySelector('.canvas');
        const gl = canvas.getContext('webgl');
        const program = initShader(gl);

        const vertices = new Float32Array([
            0.5, 0.5, 0.5,
            -0.5, 0.5, 0.5,
            -0.5, -0.5, 0.5,
            0.5, -0.5, 0.5,

            0.5, 0.5, -0.5,
            -0.5, 0.5, -0.5,
            -0.5, -0.5, -0.5,
            0.5, -0.5, -0.5,

            0.5, 0.5, 0.5,
            0.5, 0.5, -0.5,

            -0.5, 0.5, 0.5,
            -0.5, 0.5, -0.5,

            -0.5, -0.5, 0.5,
            -0.5, -0.5, -0.5,

            0.5, -0.5, 0.5,
            0.5, -0.5, -0.5,
        ]);

        const buffer = gl.createBuffer();
        gl.bindBuffer(gl.ARRAY_BUFFER, buffer);
        gl.bufferData(gl.ARRAY_BUFFER, vertices, gl.STATIC_DRAW);

        const posLocation = gl.getAttribLocation(program, 'aPosition');

        // 告诉解析器,怎么解析我们缓冲区里面的数据
        gl.vertexAttribPointer(posLocation, 3, gl.FLOAT, false, 3 * Float32Array.BYTES_PER_ELEMENT, 0);

        gl.enableVertexAttribArray(posLocation);  // 启用顶点属性数组

        // 绘制
        gl.drawArrays(gl.POINTS, 0, 4);
        gl.drawArrays(gl.LINE_LOOP, 0, 4);
        gl.drawArrays(gl.POINTS, 4, 4);
        gl.drawArrays(gl.LINE_LOOP, 4, 4);

        gl.drawArrays(gl.LINES, 8, 2 * 4); // 从第 8 组开始画线,一共画 8 个顶点
    </script>
第十一节 使用索引绘制立方体
在上一节中,我们绘制了一个立方体,但那种办法并不好。在复杂的环境和高频渲染中会达到性能瓶颈。而且,三角形是属于面的,上节中画的线框,它不具备面的特性,无法添加纹理颜色等。
所以我们主流的绘制立方体的办法,还是使用三角形,在本节,我们使用绘制三角形来绘制一个立方体。相较上节内容,这节会复杂一点。我们会用到索引。
这是一个立方体:
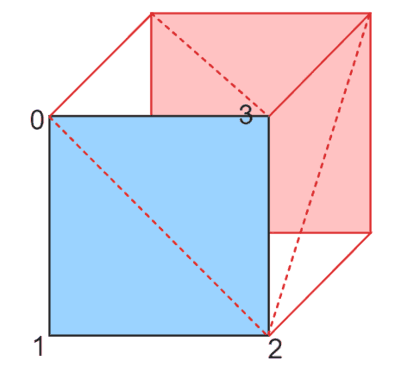
每个面都是两个三角形,每个三角形是 3 个点,一共 12 个三角形,一共是 2 3 6 = 36 个点(包含共用的点),我们一会儿的索引,会每三个点来定义一个三角形,将所有三角形的点整理出来,然后通过循环语句,将面一个个绘制出来。然后我们还会将每个面添加颜色。
首先是每个面的点的坐标。当然,里面所有的点都会被重复使用:
const vertices = new Float32Array([
            // 前面
            -0.5, -0.5, 0.5,
            0.5, -0.5, 0.5,
            0.5, 0.5, 0.5,
            -0.5, 0.5, 0.5,

            // 后面
            -0.5, -0.5, -0.5,
            -0.5, 0.5, -0.5,
            0.5, 0.5, -0.5,
            0.5, -0.5, -0.5,

            // 上面
            -0.5, 0.5, -0.5,
            -0.5, 0.5, 0.5,
            0.5, 0.5, 0.5,
            0.5, 0.5, -0.5,

            // 下面
            -0.5, -0.5, -0.5,
            0.5, -0.5, -0.5,
            0.5, -0.5, 0.5,
            -0.5, -0.5, 0.5,

            // 右面
            0.5, -0.5, -0.5,
            0.5, 0.5, -0.5,
            0.5, 0.5, 0.5,
            0.5, -0.5, 0.5,

            // 左面
            -0.5, -0.5, -0.5,
            -0.5, -0.5, 0.5,
            -0.5, 0.5, 0.5,
            -0.5, 0.5, -0.5,
]);
然后是索引:
// 索引
const indices = new Uint16Array([
    0,1,2, 0,2,3,  // 前面的两个三角形
    4,5,6, 4,6,7,  // 后面
    8,9,10, 8,10,11,  // 上面
    12,13,14, 12,14,15,  // 下面
    16,17,18, 16,18,19,  // 右边
    20,21,22, 20,22,23,  // 左边
]);
这个索引是什么意思呢?“前面”的“0,1,2,0,2,3” 就是上面图中的 1 2 3 4 四个顶点。0,1,2 是一个三角形,0,2,3 是一个三角形。一共 12 个三角形。
之后就是绑定了,和 坐标 存储入缓冲区一样,但是这里不是gl.ARRAY_BUFFER,而是 gl.ELEMENT_ARRAY_BUFFER:
// 坐标和索引进行绑定
const indexBuffer = gl.createBuffer();  // 创建索引缓冲区
gl.bindBuffer(gl.ELEMENT_ARRAY_BUFFER, indexBuffer);
gl.bufferData(gl.ELEMENT_ARRAY_BUFFER, indices, gl.STATIC_DRAW);
为了更美观的显示效果,我们再给每个面都涂上颜色。
const faceColors = [
    [1.0, 0.0, 0.0, 1.0],  // 前
    [0.0, 1.0, 0.0, 1.0],  // 后
    [0.0, 0.0, 1.0, 1.0],  // 上
    [1.0, 1.0, 0.0, 1.0],  // 下
    [1.0, 0.0, 1.0, 1.0],  // 右
    [0.0, 1.0, 1.0, 1.0],  // 左
];
const colorLocation = gl.getUniformLocation(program, 'uColor');  // 别忘了获取颜色属性
接下来就是核心了!
for (let index = 0; index < 6; index++) {
    gl.uniform4fv(colorLocation, faceColors[index]);
    gl.drawElements(
        gl.TRIANGLES,  // 三角形模式
        6, // 6 个顶点(两个三角形)
        gl.UNSIGNED_SHORT,  // 索引 的数据格式
        index * 6 * Uint16Array.BYTES_PER_ELEMENT  // 开始的位置
    );  // 绘制
}
我们这次是使用一个循环语句来绘制我们的图形。
首先,我们第一个应该去关注的,应该是 drawElements() 这个绘制方法。在之前,我们一直使用的 drawArrays()。这两种方法的主要区别是:drawElements() 管理着具有索引结构的三维模型数据。
drawElements(mode, count, type, offset);- mode:绘制方式,和 drawArray() 一样
- count:顶点个数
- tyep:索引值的数据类型。(Uint16Array 则是 gl.UNSIGNED_SHORT,Unit8Array 则是 gl.UNSIGNED_BYTE)
- offset:开始绘制的位置,以字节为单位
这个循环,每次绘制两个三角形,也就是一个面,6 个顶点。
最终的结果是这样:
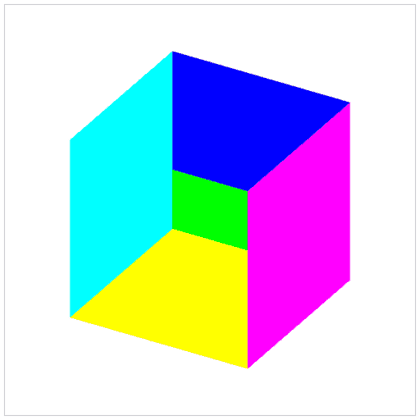
一个很奇怪的图像..... 这是因为我们没有开启非常非常非常重要的一个声明!深度测试 DEPTH_TEST(也加隐藏面消除)。在缓冲区里面先后顺序的原因,它们叠加了。我们需要让程序重新计算,以防止远处的物体遮住近处的物体。
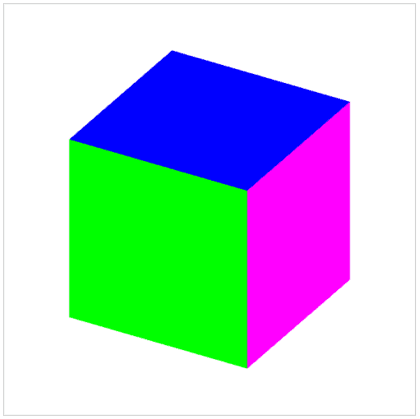
在我们程序的上面,写上 gl.enable(gl.DEPTH_TEST); ,最终效果如图所示:
完整代码
本节的完整代码为:
<canvas class="canvas" width="500" height="500"></canvas>

    <!-- 顶点着色器--><script id="vertex-shader" type="x-shader/x-vertex">
        attribute vec4 aPosition;
        void main(){
            float radian = radians(30.0);
            float sin = sin(radian);
            float cos = cos(radian);
            mat4 mx = mat4(  // 旋转矩阵
                1, 0, 0, 0,
                0, cos, -sin, 0,
                0, sin, cos, 0,
                0, 0, 0, 1
            );
            mat4 my = mat4(  // 旋转矩阵
                cos, 0, -sin, 0,
                0, 1, 0, 0,
                sin, 0, cos, 0,
                0, 0, 0, 1
            );
            mat4 mz = mat4(  // 旋转矩阵
                cos, -sin, 0, 0,
                sin, cos, 0, 0,
                0, 0, 1, 0,
                0, 0, 0, 1
            );

            gl_Position = mx * my * aPosition;
            gl_PointSize = 10.0;
        }
    </script>

    <!-- 片元着色器--><script id="fragment-shader" type="x-shader/x-fragment">
        precision mediump float;  // 声明精度
        uniform vec4 uColor;
        void main(){
            gl_FragColor = uColor;
        }
    </script>
    <script type="module">
        import initShader from './utiles/initShader.js';
        const canvas = document.querySelector('.canvas');
        const gl = canvas.getContext('webgl');
        const program = initShader(gl);

        // 启用深度测试
        gl.enable(gl.DEPTH_TEST);

        const vertices = new Float32Array([
            // 前面
            -0.5, -0.5, 0.5,
            0.5, -0.5, 0.5,
            0.5, 0.5, 0.5,
            -0.5, 0.5, 0.5,

            // 后面
            -0.5, -0.5, -0.5,
            -0.5, 0.5, -0.5,
            0.5, 0.5, -0.5,
            0.5, -0.5, -0.5,

            // 上面
            -0.5, 0.5, -0.5,
            -0.5, 0.5, 0.5,
            0.5, 0.5, 0.5,
            0.5, 0.5, -0.5,

            // 下面
            -0.5, -0.5, -0.5,
            0.5, -0.5, -0.5,
            0.5, -0.5, 0.5,
            -0.5, -0.5, 0.5,

            // 右面
            0.5, -0.5, -0.5,
            0.5, 0.5, -0.5,
            0.5, 0.5, 0.5,
            0.5, -0.5, 0.5,

            // 左面
            -0.5, -0.5, -0.5,
            -0.5, -0.5, 0.5,
            -0.5, 0.5, 0.5,
            -0.5, 0.5, -0.5,

        ]);

        const buffer = gl.createBuffer();
        gl.bindBuffer(gl.ARRAY_BUFFER, buffer);
        gl.bufferData(gl.ARRAY_BUFFER, vertices, gl.STATIC_DRAW);

        // 索引
        const indices = new Uint16Array([
            0,1,2, 0,2,3,
            4,5,6, 4,6,7,
            8,9,10, 8,10,11,
            12,13,14, 12,14,15,
            16,17,18, 16,18,19,
            20,21,22, 20,22,23,
        ]);

        // 坐标和索引进行绑定
        const indexBuffer = gl.createBuffer();
        gl.bindBuffer(gl.ELEMENT_ARRAY_BUFFER, indexBuffer);
        gl.bufferData(gl.ELEMENT_ARRAY_BUFFER, indices, gl.STATIC_DRAW);

        const posLocation = gl.getAttribLocation(program, 'aPosition');

        // 告诉解析器,怎么解析我们缓冲区里面的数据
        gl.vertexAttribPointer(posLocation, 3, gl.FLOAT, false, 3 * Float32Array.BYTES_PER_ELEMENT, 0);

        gl.enableVertexAttribArray(posLocation);  // 启用顶点属性数组

        const faceColors = [
            [1.0, 0.0, 0.0, 1.0],
            [0.0, 1.0, 0.0, 1.0],
            [0.0, 0.0, 1.0, 1.0],
            [1.0, 1.0, 0.0, 1.0],
            [1.0, 0.0, 1.0, 1.0],
            [0.0, 1.0, 1.0, 1.0],
        ];

        const colorLocation = gl.getUniformLocation(program, 'uColor');
        for (let index = 0; index < 6; index++) {
            gl.uniform4fv(colorLocation, faceColors[index]);
            gl.drawElements(gl.TRIANGLES, 6, gl.UNSIGNED_SHORT, index * 6 * Uint16Array.BYTES_PER_ELEMENT);  // 绘制
        }
    </script>
第十二节 旋转动画
至此,webgl 的基础入门内容就搞定了。现在我们来添加一个炫酷的动画,让三维的效果更加的突出和直观!
其实,我们着色器没必要写矩阵变换,我们其实可以将矩阵写到到 js 里,这样也可以让程序的可扩展性更强。着色器代码越简单越好。
我们删去着色器里面的矩阵变换代码,让两个矩阵变换的矩阵以 uniform 格式接收缓冲区的数据,就像我们第八节的 uniform 接收我们的平移转换数值一样(这里只写 X 和 Y 轴的旋转矩阵变换就行了,方便演示),只不过我们传递的是矩阵,使用的是另一个方法 uniformMatrix4fv:
在 js 里写上 javascript 格式的矩阵,直接传过去:
let deg = 30;  // 旋转度数
const cosB = Math.cos(deg * Math.PI / 180);
const sinB = Math.sin(deg * Math.PI / 180);
gl.uniformMatrix4fv(u_x_matrix, false, new Float32Array([
    1, 0, 0, 0,
    0, cosB, -sinB, 0,
    0, sinB, cosB, 0,
    0, 0, 0, 1
]));
gl.uniformMatrix4fv(u_y_matrix, false, new Float32Array([
    cosB, 0, -sinB, 0,
    0, 1, 0, 0,
    sinB, 0, cosB, 0,
    0, 0, 0, 1
]));
之后,我们使用在 javascript 广泛使用的内置动画函数 requestAnimationFrame,这个函数和 settimeout 不一样,它更智能,无需特意去设置时间间隔等,能根据机器性能等生成一个每秒大约 60 帧的动画。
它的用法大概如此:
function render() {

    // 我们的代码写到此处,便可以每秒约 60 次的频率进行执行
    // ...
    // ...

    window.requestAnimationFrame(render)
}
window.requestAnimationFrame(render) // 大约每秒 60 帧
我们将上面的代码整理起来,放到 render() 函数里,如下所示:
let deg = 30;
function render() {
    deg += 0.5;  // 速度
    const cosB = Math.cos(deg * Math.PI / 180);
    const sinB = Math.sin(deg * Math.PI / 180);
    gl.uniformMatrix4fv(u_x_matrix, false, new Float32Array([
        1, 0, 0, 0,
        0, cosB, -sinB, 0,
        0, sinB, cosB, 0,
        0, 0, 0, 1
    ]));
    gl.uniformMatrix4fv(u_y_matrix, false, new Float32Array([
        cosB, 0, -sinB, 0,
        0, 1, 0, 0,
        sinB, 0, cosB, 0,
        0, 0, 0, 1
    ]));
    for (let index = 0; index < 6; index++) {
        gl.uniform4fv(colorLocation, faceColors[index]);
        gl.drawElements(gl.TRIANGLES, 6, gl.UNSIGNED_SHORT, index * 6 * Uint16Array.BYTES_PER_ELEMENT);  // 绘制
    }
    window.requestAnimationFrame(render)
}
window.requestAnimationFrame(render) // 大约每秒 60 帧
打开浏览器,效果如下:
本节的完整代码如下:
    <canvas class="canvas" width="500" height="500"></canvas>

    <!-- 顶点着色器--><script id="vertex-shader" type="x-shader/x-vertex">
        attribute vec4 aPosition;
        uniform mat4 u_x_matrix;
        uniform mat4 u_y_matrix;
        void main(){
            gl_Position = u_x_matrix * u_y_matrix * aPosition;
            gl_PointSize = 10.0;
        }
    </script>

    <!-- 片元着色器--><script id="fragment-shader" type="x-shader/x-fragment">
        precision mediump float;  // 声明精度
        uniform vec4 uColor;
        void main(){
            gl_FragColor = uColor;
        }
    </script>
    <script type="module">
        import initShader from './utiles/initShader.js';
        const canvas = document.querySelector('.canvas');
        const gl = canvas.getContext('webgl');
        const program = initShader(gl);

        // 启用深度测试(很重要,课程里没有讲到)
        gl.enable(gl.DEPTH_TEST);

        const vertices = new Float32Array([
            // 前面
            -0.5, -0.5, 0.5,
            0.5, -0.5, 0.5,
            0.5, 0.5, 0.5,
            -0.5, 0.5, 0.5,

            // 后面
            -0.5, -0.5, -0.5,
            -0.5, 0.5, -0.5,
            0.5, 0.5, -0.5,
            0.5, -0.5, -0.5,

            // 上面
            -0.5, 0.5, -0.5,
            -0.5, 0.5, 0.5,
            0.5, 0.5, 0.5,
            0.5, 0.5, -0.5,

            // 下面
            -0.5, -0.5, -0.5,
            0.5, -0.5, -0.5,
            0.5, -0.5, 0.5,
            -0.5, -0.5, 0.5,

            // 右面
            0.5, -0.5, -0.5,
            0.5, 0.5, -0.5,
            0.5, 0.5, 0.5,
            0.5, -0.5, 0.5,

            // 左面
            -0.5, -0.5, -0.5,
            -0.5, -0.5, 0.5,
            -0.5, 0.5, 0.5,
            -0.5, 0.5, -0.5,

        ]);

        const buffer = gl.createBuffer();
        gl.bindBuffer(gl.ARRAY_BUFFER, buffer);
        gl.bufferData(gl.ARRAY_BUFFER, vertices, gl.STATIC_DRAW);

        // 索引
        const indices = new Uint16Array([
            0,1,2, 0,2,3,
            4,5,6, 4,6,7,
            8,9,10, 8,10,11,
            12,13,14, 12,14,15,
            16,17,18, 16,18,19,
            20,21,22, 20,22,23,
        ]);

        // 坐标和索引进行绑定
        const indexBuffer = gl.createBuffer();
        gl.bindBuffer(gl.ELEMENT_ARRAY_BUFFER, indexBuffer);
        gl.bufferData(gl.ELEMENT_ARRAY_BUFFER, indices, gl.STATIC_DRAW);

        const posLocation = gl.getAttribLocation(program, 'aPosition');

        // 告诉解析器,怎么解析我们缓冲区里面的数据
        gl.vertexAttribPointer(posLocation, 3, gl.FLOAT, false, 3 * Float32Array.BYTES_PER_ELEMENT, 0);

        gl.enableVertexAttribArray(posLocation);  // 启用顶点属性数组

        const faceColors = [
            [1.0, 0.0, 0.0, 1.0],
            [0.0, 1.0, 0.0, 1.0],
            [0.0, 0.0, 1.0, 1.0],
            [1.0, 1.0, 0.0, 1.0],
            [1.0, 0.0, 1.0, 1.0],
            [0.0, 1.0, 1.0, 1.0],
        ];

        const colorLocation = gl.getUniformLocation(program, 'uColor');
        const u_x_matrix = gl.getUniformLocation(program, 'u_x_matrix');
        const u_y_matrix = gl.getUniformLocation(program, 'u_y_matrix');

        /*
            mat4 mx = mat4(  // 旋转矩阵
                1, 0, 0, 0,
                0, cos, -sin, 0,
                0, sin, cos, 0,
                0, 0, 0, 1
            );
            mat4 my = mat4(  // 旋转矩阵
                cos, 0, -sin, 0,
                0, 1, 0, 0,
                sin, 0, cos, 0,
                0, 0, 0, 1
            );
            mat4 mz = mat4(  // 旋转矩阵
                cos, -sin, 0, 0,
                sin, cos, 0, 0,
                0, 0, 1, 0,
                0, 0, 0, 1
            );
        */

        let deg = 30;
        function render() {
            deg += 0.5;  // 速度
            const cosB = Math.cos(deg * Math.PI / 180);
            const sinB = Math.sin(deg * Math.PI / 180);
            gl.uniformMatrix4fv(u_x_matrix, false, new Float32Array([
                1, 0, 0, 0,
                0, cosB, -sinB, 0,
                0, sinB, cosB, 0,
                0, 0, 0, 1
            ]));
            gl.uniformMatrix4fv(u_y_matrix, false, new Float32Array([
                cosB, 0, -sinB, 0,
                0, 1, 0, 0,
                sinB, 0, cosB, 0,
                0, 0, 0, 1
            ]));
            for (let index = 0; index < 6; index++) {
                gl.uniform4fv(colorLocation, faceColors[index]);
                gl.drawElements(gl.TRIANGLES, 6, gl.UNSIGNED_SHORT, index * 6 * Uint16Array.BYTES_PER_ELEMENT);  // 绘制
            }
            window.requestAnimationFrame(render)
        }
        window.requestAnimationFrame(render) // 大约每秒 60 帧
    </script>
参考资料
参考资料有:
https://www.bilibili.com/video/BV1AS411A74T
https://developer.mozilla.org/zh-CN/docs/Web/API/WebGL_API
https://bx2eq6ulg18.feishu.cn/docx/I4hTdO95qozPBOxauPlcbDfInVd?from=from_copylink
https://www.qianbo.com.cn/Tool/Text-Difference/
https://excalidraw.com/
https://avikdas.com/2020/07/08/barebones-webgl-in-75-lines-of-code.htm
推荐阅读:

const colorBuffer = gl.createBuffer();
gl.bindBuffer(gl.ARRAY_BUFFER, colorBuffer);
gl.bufferData(gl.ARRAY_BUFFER, vertices, gl.STATIC_DRAW);
gl.vertexAttribPointer(colorLocation, 4, gl.FLOAT, false, 4 * Float32Array.BYTES_PER_ELEMENT, 2 * Float32Array.BYTES_PER_ELEMENT);
gl.enableVertexAttribArray(colorLocation);
中 gl.vertexAttribPointer(colorLocation, 4, gl.FLOAT, false, 4 * Float32Array.BYTES_PER_ELEMENT, 2 * Float32Array.BYTES_PER_ELEMENT);
为什么是4 * Float32Array.BYTES_PER_ELEMENT而不是6 * Float32Array.BYTES_PER_ELEMENT

没错,就应该是 6 * Float32Array.BYTES_PER_ELEMENT 。
另外,还有颜色,刚才我把透明颜色都关掉了, RGBA 颜色有四个值,最后那个是透明度,不应该写 0.0 。
我把第 4 节至第 7 节重新都整理修改了一遍,包括图片,现在应该没问题了。感谢指出! (;゚∀゚)=3ハァハァ

